![]()
![]()
![]()
![]()
Baking is an experiment. Sometimes it works out and sometimes it is a complete and total fail. Especially when baking cakes, a little too much of this or a not enough of that and you have completely ruined your masterpiece.
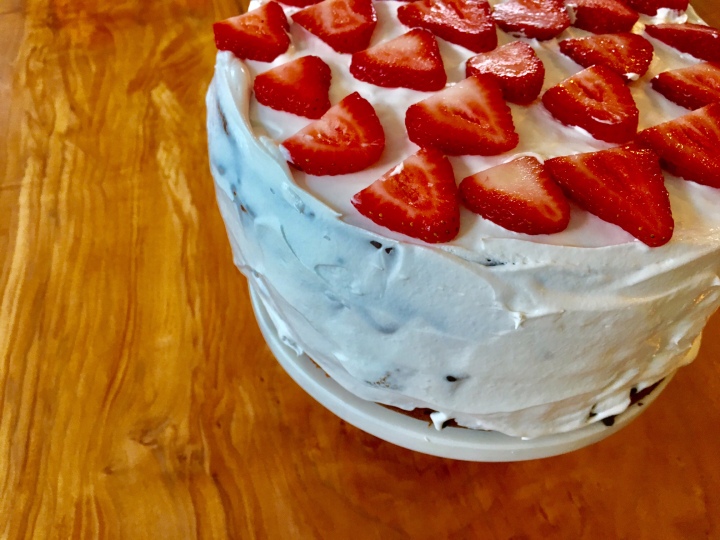
This cake was an experiment – the first one of its kind that I’ve made. And it turned out PERFECTLY. Guys, if you are a cake lover or not, you need to try this. Chocolate, vanilla, strawberries and whipped coconut creme as a frosting – it is a dream come true. In cake form.
Moist. Decadent. Certainly sits heavy… But oh so worth every bite. And more!
I would strongly advise that you make this cake in two parts – the cakes will need time to cool completely before assembling, so if you need to let them rest overnight (which is what I did) then make sure to plan ahead before embarking on this cake journey.
Recipe
CAKE #1 – Chocolate
2 cups Gluten Free Flour (Red Mill)
3/4 cup unsweetened dark cocoa powder
2 tsp baking powder
1 1/2 tsp baking soda
1 tsp salt
2 cups pure agave OR honey
1 cup non-dairy milk (I use unsweetened Almond Milk, but use Rice Dream for nut allergies)
1/2 cup vegetable or canola oil
2 Tbsp Flax Seed (OR 2 eggs)
2 tsp vanilla extract
1 cup boiling water
CAKE #2 – Vanilla
2 1/2 cups Gluten Free Flour (Red Mill)
2 tsp baking powder
1 1/2 tsp baking soda
1 tsp salt
2 cups pure agave
1 cup non-dairy milk (I use unsweetened Almond Milk, but use Rice Dream for nut allergies)
1/2 cup vegetable or canola oil
2 Tbsp Flax Seed (OR 2 eggs)
2 tsp vanilla extract
1 cup boiling water
CAKE DIRECTIONS:
In a large bowl (or KithenAid Mixer) combine your dry ingredients – flour, cocoa powder, baking powder, baking soda, salt. Next, add the agave, oil, and vanilla extract. Mix well.
In a separate small bowl, measure out your flax seed. Pour warm water (3 Tbsp of warm water to 1 Tbsp of flax seed) into the small bowl and whisk with a fork. Once the mixture resembles an egg white in texture, set aside for a couple of minutes to rest, and then combine with your cake batter mixture. Add in your non-dairy milk and mix thoroughly.
Once your cake batter is well combined, add a cup of boiling water into the mixture. Set a timer for one minute, and whisk quickly (or set your mixer on high) to beat the batter well. This aerates the batter, giving it a light taste and texture.

Prepare two 9-inch cake pans and grease thoroughly with cooking spray (may contain soy) or soft Earth Balance (Soy Free). Pour half of the vanilla batter into each cake pan, distributing equally. Then, pour half of the chocolate cake batter on top of the vanilla in each pan. Use a spatula to gently swirl the two batters together, not mixing entirely. Place in oven for roughly 45 minutes. To test that your cake is done, stick a knife or toothpick into the center of the cake, and if the utensil comes out clean it is ready! If the utensil has remnants of the batter stuck to it upon removal, the cake needs more time.

STRAWBERRY FILLING
1 1/2 cups sliced strawberries
2 Tbsp pure honey
1/4 tsp Agar Agar powder
DIRECTIONS:
Combine sliced strawberries and honey in a small pot on the stove on medium heat. Bring to a gentle boil, and one the mixture cooks down add in your agar agar powder. Stir well and simmer for a couple of minutes before removing from heat. Pour mixture into a bowl and place in fridge.
CHOCOLATE COATING
1 1/2 cups non-dairy chocolate chips (Enjoy Life)
1/2 cup non-dairy milk (I use unsweetened Almond Milk, but use Rice Dream for nut allergies)
DIRECTIONS:
Combine chocolate chips and almond milk in a bowl and melt in the microwave (OR bring a small pot of water to a simmer and place the bowl over the water creating a double boiler in order to melt the chocolate without burning it).
CAKE ASSEMBLY
**Make sure your cakes and strawberry mixture are completely cooled at this point.
Use one cake as the base. If the top is round and large, cut to make flat so that it is easily stack-able. Once done, spread a layer of chocolate on top of the cake, making sure that it bleeds into the body of the cake – it’s okay if it drips down the sides. Next spread a layer of strawberry mixture on the cake on top of the chocolate. Stack your second cake on top of the layers. Poke holes in the top of the cake that go all the way through the body, and then drizzle a thick coat of chocolate on top of the cake again.
Next, (once the chocolate coating on top has hardened/cooled) get out your coconut cream (either homemade or, for the sake of saving time, So Delicious cool whip). **For the homemade version from The Minimalist Baker blog, I substitute agave or honey for the refined sugar and it works beautifully!
Spread the coconut cream over the cake and on the sides, creating a thin layer that covers the cake completely. Use fresh, sliced strawberries to decorate the top of the cake however you like, and then voila! Your cake is done!

When not being served, make sure to place the cake in the fridge to preserve the cool whip frosting.
ENJOY! Everyone will love the decadence that this delightful treat delivers.
(And your friends will never know it is dairy free, gluten free, and free of refined sugars!!)


